FAQs
Information on and answers to some of the most frequently asked questions in conjunction with the use of our software “PdfEditor”.
Search FAQs
PdfGrabber 8 and PdfEditor 3 are executable up to and including Windows 10 – Version 1607.
The subsequent version 1703 (Windows Creators-Update) is comparable with the earlier version jumps of Microsoft (e.g. “7 to 8” or “8 to 10”) and introduced considerable changes in the operating system, which also affect PdfEditor 3 and PdfGrabber 8.
If you want to use PdfEditor or PdfGrabber under Windows 10 from version 1703, please update to the current PdfGrabber/PdfEditor version.
To update please visit our shop for updates & upgrades.
Issue: During installation you get error 1327, which references an invalid drive number.
Causes: The System Registry may be erroneously pointing to an invalid or temp drive.
Solution:
- Back up your Windows Registry.
- Open Windows Start menu, choose ‘Run’ (on Windows 10 press [WINDOWS + R]), type “regedit” and press [ENTER].
- Navigate to the folder: HKEY_CURRENT_USER\Software\Microsoft\Windows\CurrentVersion\Explorer\User Shell Folders
- On the right search for entries that list the incorrect drive.
- Modify the incorrect drive to the correct drive letter, i.e. C:\.
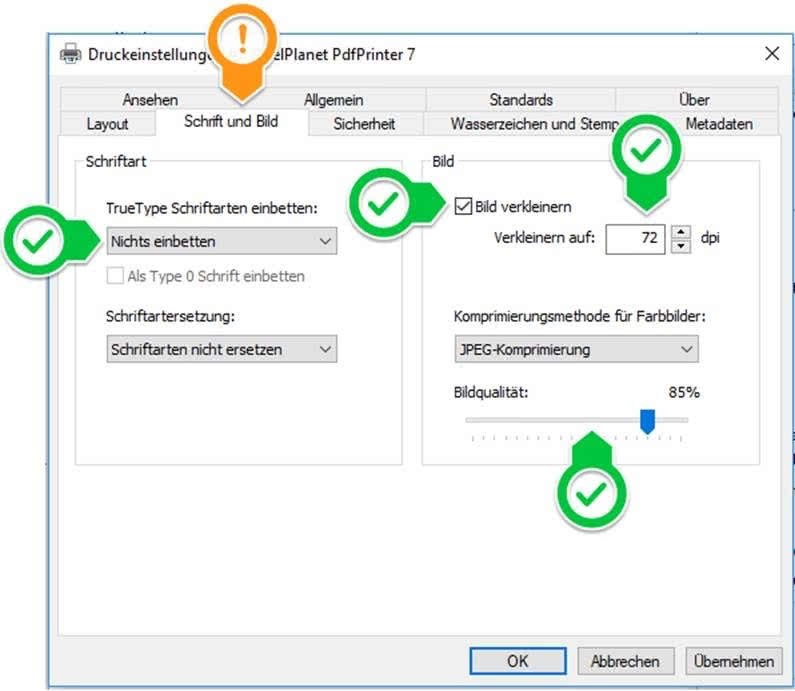
PixelPlanet PdfPrinter” can be used to reduce the size of PDF files (included in PdfEditor and PdfGrabber). To do this, simply regenerate your PDF by opening it in Acrobat Reader and then “print” it to the “PixelPlanet PdfPrinter”.
In the print settings, the following options can be used to reduce the file size:
Uninstall the current version of PdfEditor 4 from the Control Panel and restart your computer. Then perform a new installation with the following installation file:
Tesseract OCR language packages are normally saved to the directory “%programdata%\PixelPlanet\Tesseract3_5”.
They can, however, also be manually saved to the installation directory:
PdfEditor:
“%programdata%\PixelPlanet\Tesseract3_5\tessdata\”
AND
“C:\Program Files (x86)\PixelPlanet\PdfEditor 4\Tesseract3_5\tessdata\”
PdfGrabber:
“%programdata%\PixelPlanet\Tesseract3_5\tessdata\”
AND
“C:\Program Files (x86)\PixelPlanet\PdfGrabber 4\Tesseract3_5\tessdata\”
Extract the content of the respective ZIP file (see below) into the previously named directories.
Language packages
Afrikaans,
Amharic,
Arabic,
Assamese,
Azerbaijani,
Azerbaijani – Cyrillic,
Belarusian,
Bengali,
Tibetian,
Bosnian,
Bulgarian,
Catalan,
Cebuano,
Czech,
Chinese (Simplified),
Chinese (Traditional),
Cherokee,
Welsh,
Danish,
German,
Dzongkha,
Greek (modern),
English,
English, Middle (1100-1500),
Esperanto,
Estonian,
Basque,
Persian,
Finnish,
French,
Frankish,
Hebrew,
Hindu,
Hungarian,
Indonesian,
Italian,
Japanese,
Korean,
Latvian,
Lithuanian,
Dutch,
Norwegian,
Polish,
Portuguese,
Romanian,
Russian,
Slovak,
Slovene,
Serbian,
Spanish,
Albanian,
Serbian,
Serbian (Latin),
Swedish,
Tagalog,
Thai,
Turkish,
Ukrainian,
Uzbek,
Uzbek (Cyrillic),
Vietnamese,
Yiddish
Classic web links can be added via the toolbar command ‘Hyperlink’ as of PdfEditor 3. Simply select the desired element (text box, image, form), click on the hyperlink button in the toolbar and then enter the desired web address (with preceding http:// or https://) or e-mail address (with preceding ‘mailto:’). Web addresses in the text which can be recognised as such, are automatically converted by PdfEditor, Acrobat Reader and many other PDF programs into links which can be clicked on.
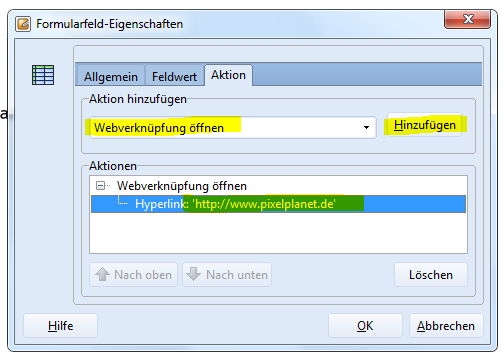
You can also place an invisible button behind or in front of the relevant text and assign a link to this as an action. For this set all colour values for the button to transparent.
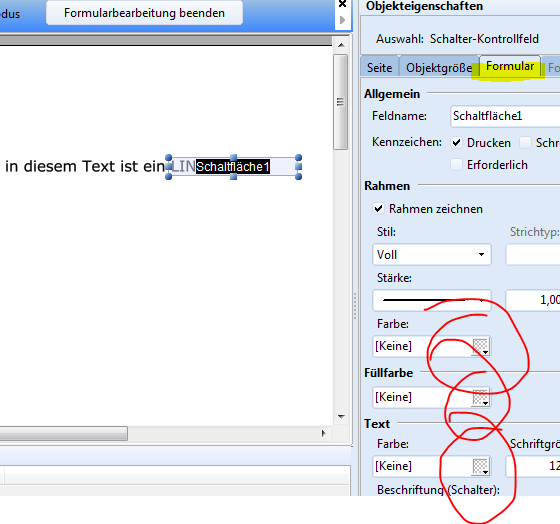
Then right-click on the button and open the form field properties. Select the Action tab and, depending on the prompt, open either Go to a page view, Open external file or Open web shortcut. Click on Add and then enter the desired page in the current document, the path to the file or the desired hyperlink.

Then exit the form mode.

1. The customer completes the form using an up-to-date Reader (functions as of Acrobat Reader X), saves it and then sends it as an e-mail attachment.
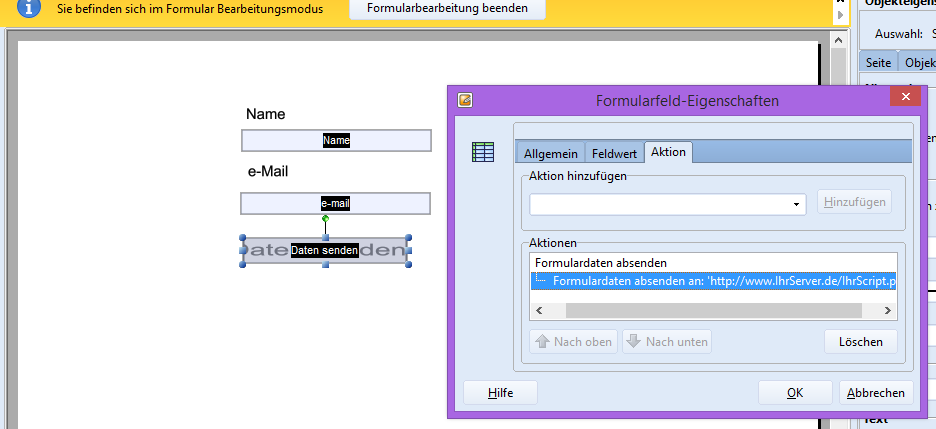
2. You integrate a button into the form via which the data entered can be sent by e-mail as an FDF file. This only contains the data and can be assigned again to a form on your computer which is then completed using this data.
To this end, add a button to your form and call up the form field properties by right clicking the mouse. Select the Action tab in the following window and add the action Send forms data. As the address, enter mailto: followed by your e-mail address.
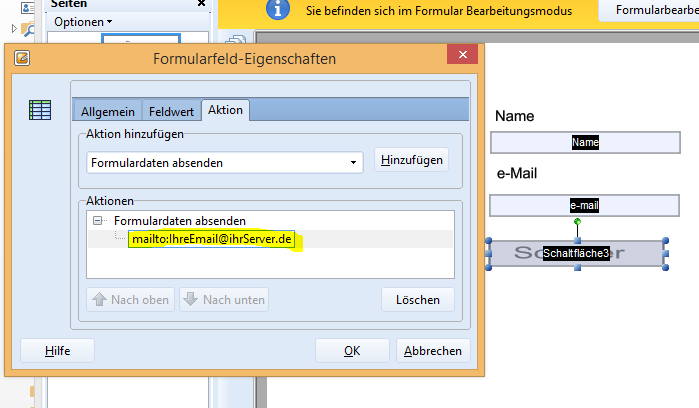
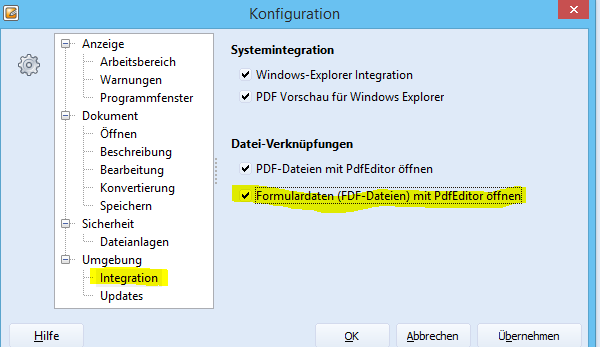
Please note that you must enable the opening of FDF forms data files in the PdfEditor under “Options – Settings – Environment – Integration”:
3. The data will be sent via a POST action to a server script to be programmed by you. This script accepts the data and processes them (e.g., entry in a database, transfer to an application or similar). For this proceed as described under 2, but this time, as the address, enter the URL for your script or server application.
We are unable to assist you with the programming of server applications. Please refer to the relevant forums (PHP, etc.) for advice.
An external image editor, e.g., Photoshop, can be selected in PdfEditor under “Preferences — Edit PDF — Editing — Default values” via the option “Aapplication for editing of images”.
PdfEditor automatically uses the last setting which was selected or made. If, for example, you click on text with the font size 100 and then create new text, this too will have font size 100. If necessary, prior to creation, click on an object (e.g., text) which has the same settings which you would like to apply to the new object.
All the properties for a selected object can be set via the “Object properties” window. If you have inadvertently closed this window, you can open it again via the menu “View — Object properties — Tabs”. The window can either be free-floating or you can drag it to the left or right edge of the window to dock it there.
With scanned files, the content of the document is available as a large graphic. As a rule, such documents do not contain text. In order to change this graphic, either use a graphic editor or perform OCR using the PdfEditor for the image contained. For this, right-click on the image and select the command “Text recognition with OCR”. In the next window, select the desired OCR software, specify the document language and select how the recognised text is to be displayed in the PDF. If the PDF is to be edited, we recommend the text display option “Visible & delete image”. “Invisible” is recommended for archiving purposes. Please note that the quality of character recognition (OCR) depends to a great extent on the quality of the scan.
Yes, simply open the desired file using the full version and make a minor change (e.g., add a space at the end of the text). Then save the PDF file and the watermark will be removed.